Manual:CHR VMWare installation: Difference between revisions
Jump to navigation
Jump to search
No edit summary |
|||
| (10 intermediate revisions by 3 users not shown) | |||
| Line 1: | Line 1: | ||
== How to Install Cloud Hosted Router on VMWare Fusion == | == How to Install Cloud Hosted Router on VMWare Fusion == | ||
=== Video instruction === | |||
[[File:CHR_VMWare_Fusion_Install.png || VMWare | link=https://www.youtube.com/watch?v=W5JyWBsXnKg]] | |||
=== Step by Step Instruction === | |||
'''Create a new virtual machine''' | |||
* Step 1: | * Step 1: | ||
[[File:CHR_VMWare_1.png | 600px | VMWare ]] | [[File:CHR_VMWare_1.png | 600px | VMWare ]] | ||
* Step 2: | * Step 2: | ||
[[File:CHR_VMWare_2.png | 600px | VMWare ]] | [[File:CHR_VMWare_2.png | 600px | VMWare ]] | ||
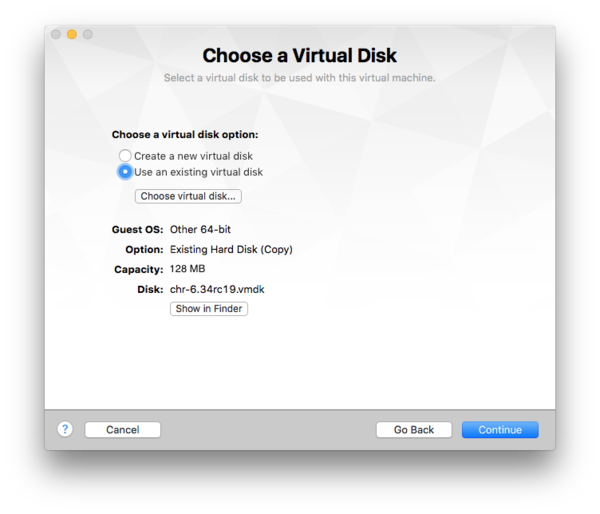
* Step 3: | * Step 3: Choose existing virtual disk | ||
[[File:CHR_VMWare_3.png | 600px | VMWare ]] | [[File:CHR_VMWare_3.png | 600px | VMWare ]] | ||
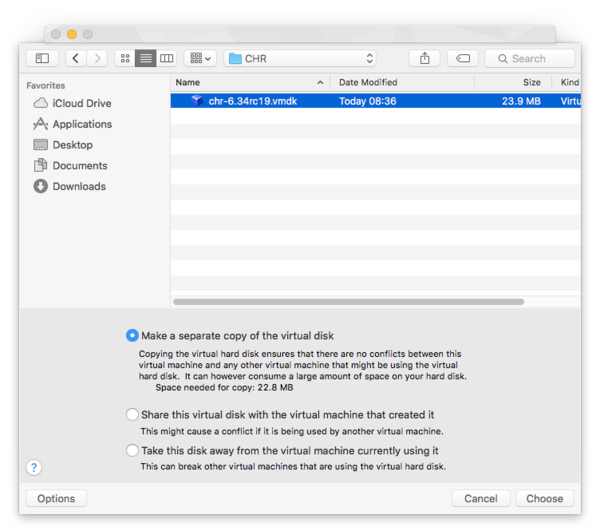
* Step 4: | * Step 4: Select the file you downloaded from [http://www.mikrotik.com/download mikrotik.com download page] | ||
[[File:CHR_VMWare_4.png | 600px | VMWare ]] | [[File:CHR_VMWare_4.png | 600px | VMWare ]] | ||
* Step 5: | * Step 5: | ||
[[File:CHR_VMWare_5.png | 600px | VMWare ]] | [[File:CHR_VMWare_5.png | 600px | VMWare ]] | ||
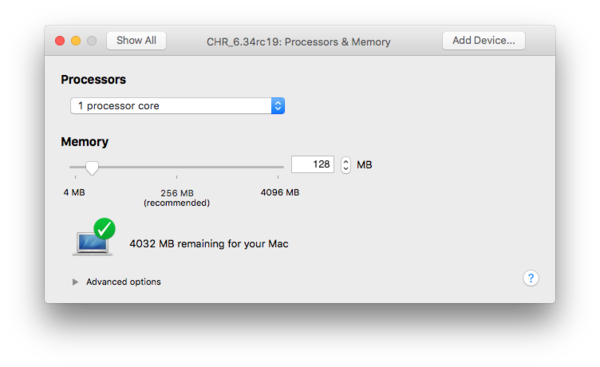
* Step 6: By default VMWare uses 256MB RAM, adjust the size if needed, any size starting from | * Step 6: By default VMWare uses 256MB RAM, adjust the size if needed, any size starting from 128MB can be used for RouterOS | ||
[[File:CHR_VMWare_6.png | 600px | VMWare ]] | [[File:CHR_VMWare_6.png | 600px | VMWare ]] | ||
* Step 7: Adjust the size of the RAM | * Step 7: Adjust the size of the RAM | ||
| Line 16: | Line 21: | ||
* Step 8: | * Step 8: | ||
[[File:CHR_VMWare_8.png | 600px | VMWare ]] | [[File:CHR_VMWare_8.png | 600px | VMWare ]] | ||
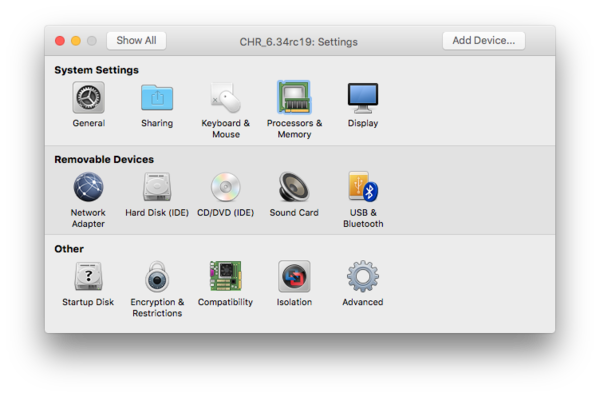
* Step 9: By default CHR disk image is | * Step 9: By default CHR disk image is 128MB. If bigger storage is desired, you can expand the virtual hard drive. Choose Customize Settings to do so. NOTE. IT MUST BE DONE BEFORE the 1st RUN. | ||
[[File:CHR_VMWare_11.png | 600px | VMWare ]] | [[File:CHR_VMWare_11.png | 600px | VMWare ]] | ||
* Step 10: Choose Hard Disk and set the new disk size | * Step 10: Choose Hard Disk and set the new disk size | ||
| Line 22: | Line 27: | ||
* Step 11: | * Step 11: | ||
[[File:CHR_VMWare_10.png | 600px | VMWare ]] | [[File:CHR_VMWare_10.png | 600px | VMWare ]] | ||
== How to Install Cloud Hosted Router on VMWare ESXi 6.5 == | |||
Quick example on how to use CHR on ESXi 6.5 via it's web interface and some cli. | |||
{{ Note | Steps will be similar in older ESX versions or when using vSphere client.}} | |||
=== Step by Step Instruction === | |||
* Step 1: | |||
Upload CHR image to your ESX/ESXi host. | |||
[[File:0-ESX-upload.png | 600px | VMWareESX ]] | |||
* Step 2: | |||
Connect to your ESX host via ssh and navigate to directory where you uploaded | |||
this image. Then convert image to one better suited for use with ESX. | |||
Image location: /vmfs/volumes/(volume id)/ | |||
convert: | |||
<pre>vmkfstools -i oldfile.vmdk newfile.vmdk -d thin</pre> | |||
2.1. Expand image if needed. | |||
Expand: | |||
<pre>vmkfstools -X 512M newfile.vmdk</pre> | |||
* Step 3: | |||
Create new VM and attach it this existing image. | |||
[[File:01-ESX-create vm0.png | 600px | VMWareESX ]] | |||
[[File:02-ESX-create vm1.png | 600px | VMWareESX ]] | |||
[[File:03-ESX-create vm2.png | 600px | VMWareESX ]] | |||
[[File:04-ESX-create vm3.png | 600px | VMWareESX ]] | |||
[[File:05-ESX-create vm4.png | 600px | VMWareESX ]] | |||
* Step 4: | |||
Assign CHR image to VM as boot disk. | |||
[[File:06-ESX-add-image0.png | 600px | VMWareESX ]] | |||
[[File:07-ESX-add-image1.png | 600px | VMWareESX ]] | |||
[[File:08-ESX-add-image2.png | 600px | VMWareESX ]] | |||
[[File:09-ESX-add-image3.png | 600px | VMWareESX ]] | |||
{{ Note | For system disk you must use IDE controller! Only additional disks can be | |||
attached to various supported SCSI controllers.}} | |||
* Step 5: Start the VM. | |||
==See also== | |||
[http://wiki.mikrotik.com/wiki/Manual:CHR CHR manual] | |||
Latest revision as of 13:19, 6 September 2017
How to Install Cloud Hosted Router on VMWare Fusion
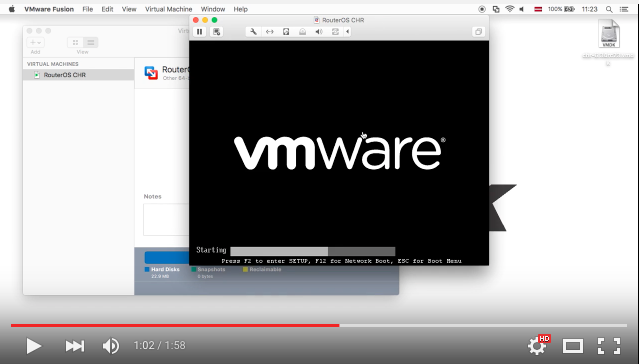
Video instruction
Step by Step Instruction
Create a new virtual machine
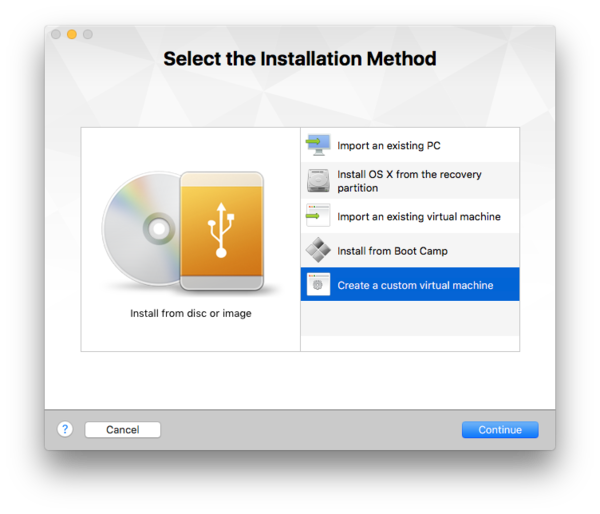
- Step 1:
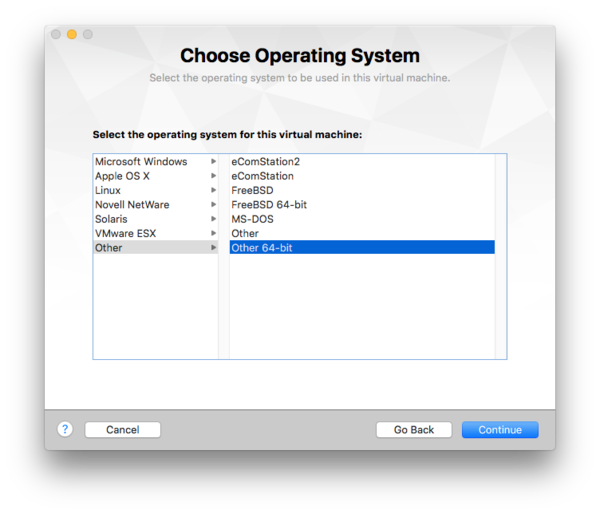
- Step 2:
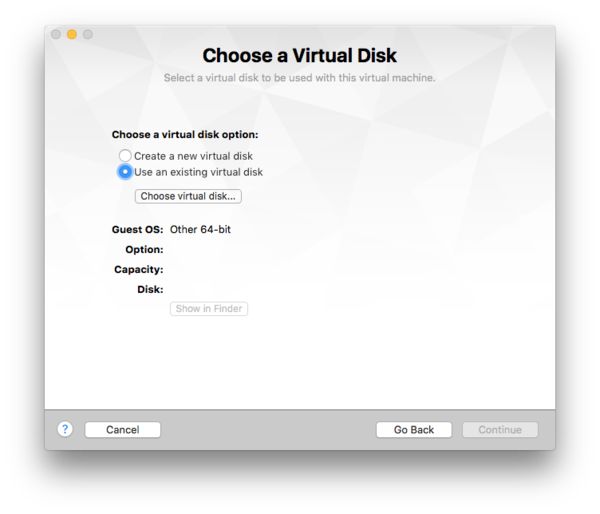
- Step 3: Choose existing virtual disk
- Step 4: Select the file you downloaded from mikrotik.com download page
- Step 5:
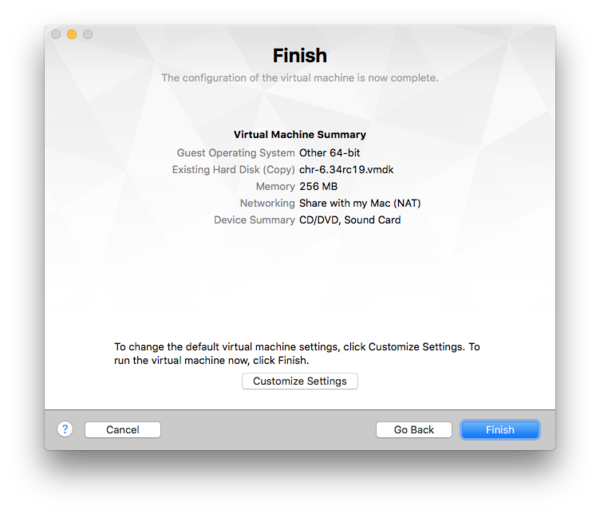
- Step 6: By default VMWare uses 256MB RAM, adjust the size if needed, any size starting from 128MB can be used for RouterOS
- Step 7: Adjust the size of the RAM
- Step 8:
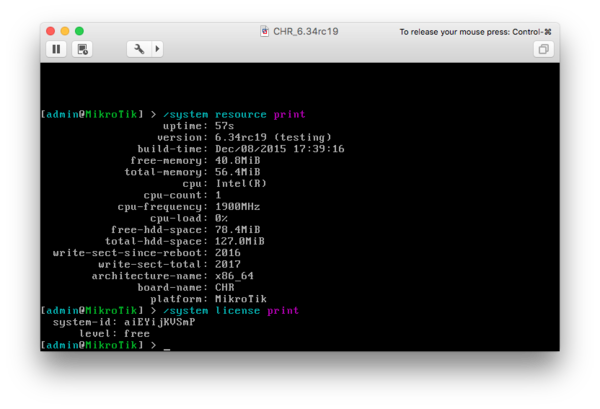
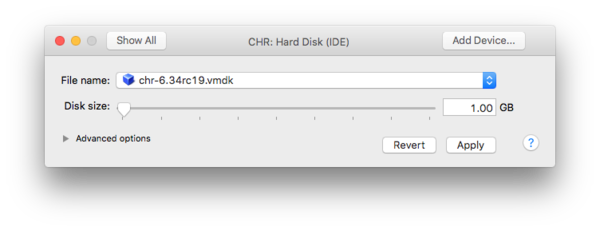
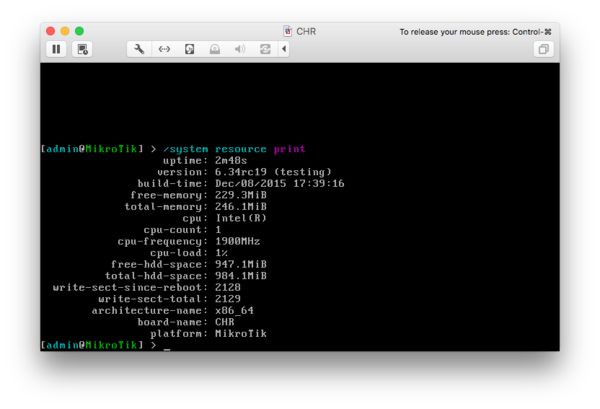
- Step 9: By default CHR disk image is 128MB. If bigger storage is desired, you can expand the virtual hard drive. Choose Customize Settings to do so. NOTE. IT MUST BE DONE BEFORE the 1st RUN.
- Step 10: Choose Hard Disk and set the new disk size
- Step 11:
How to Install Cloud Hosted Router on VMWare ESXi 6.5
Quick example on how to use CHR on ESXi 6.5 via it's web interface and some cli.
Step by Step Instruction
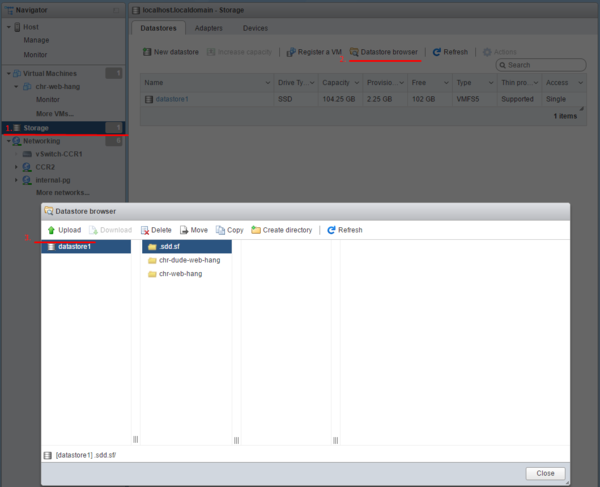
- Step 1:
Upload CHR image to your ESX/ESXi host.
- Step 2:
Connect to your ESX host via ssh and navigate to directory where you uploaded this image. Then convert image to one better suited for use with ESX.
Image location: /vmfs/volumes/(volume id)/
convert:
vmkfstools -i oldfile.vmdk newfile.vmdk -d thin
2.1. Expand image if needed.
Expand:
vmkfstools -X 512M newfile.vmdk
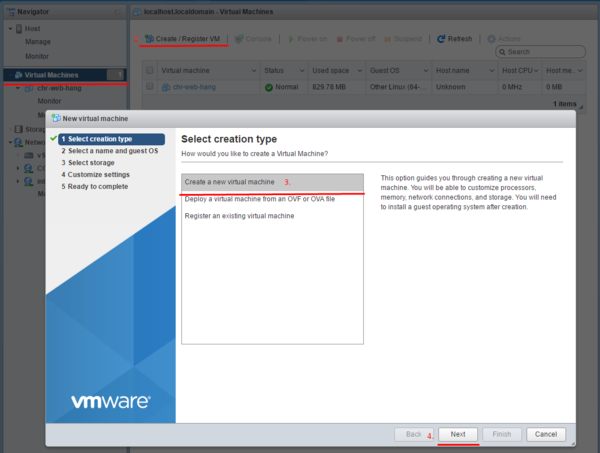
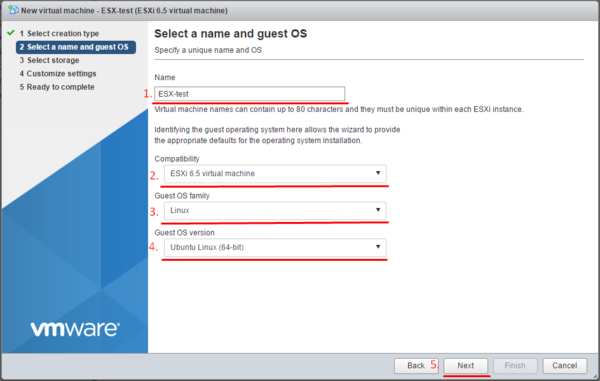
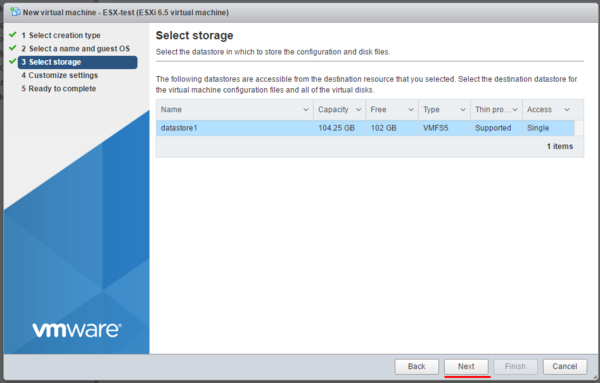
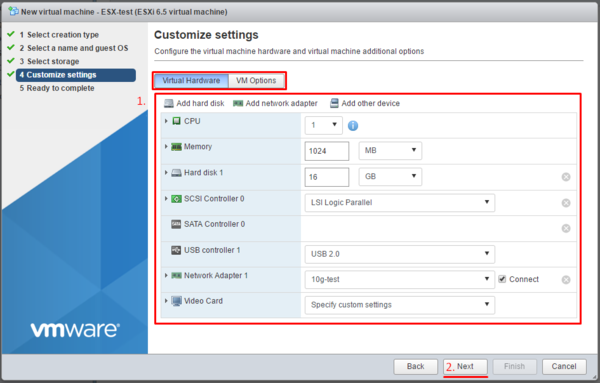
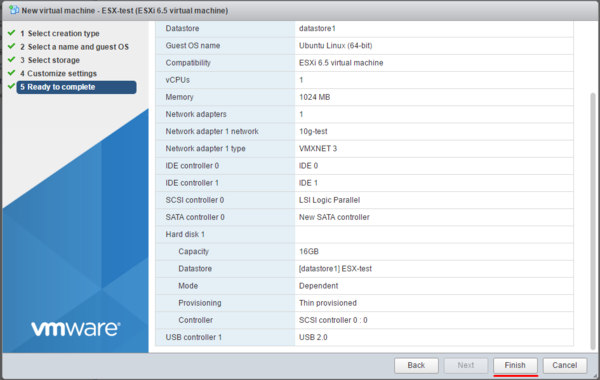
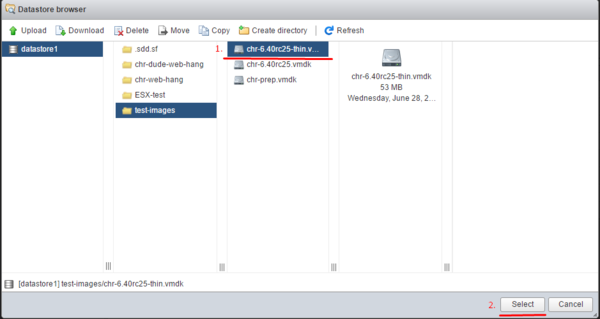
- Step 3:
Create new VM and attach it this existing image.
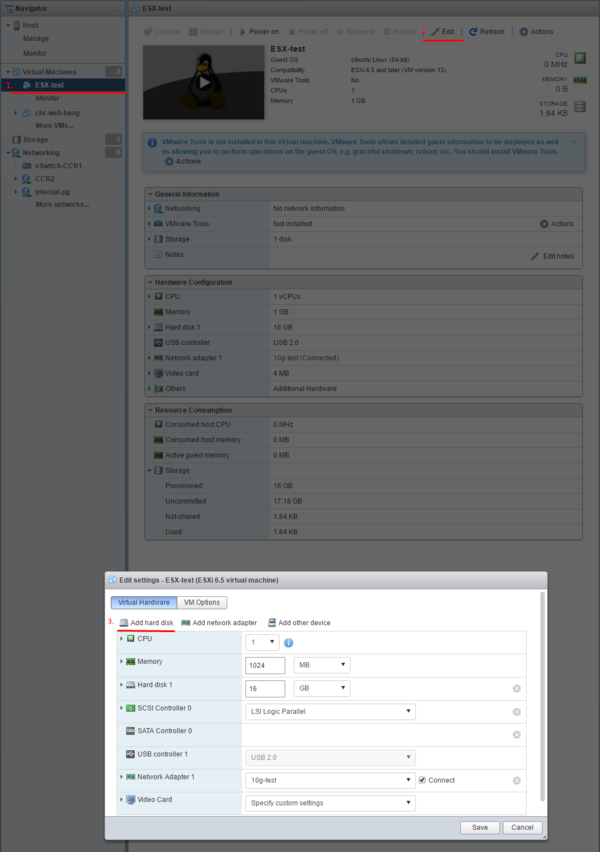
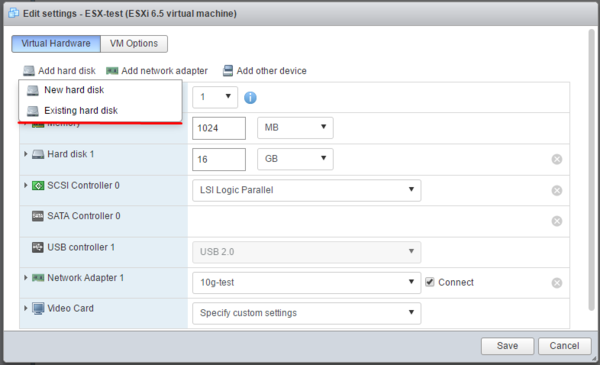
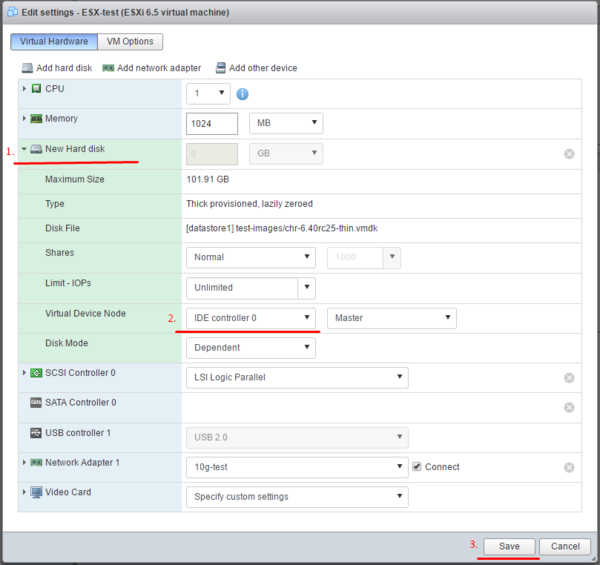
- Step 4:
Assign CHR image to VM as boot disk.

Note: For system disk you must use IDE controller! Only additional disks can be attached to various supported SCSI controllers.
- Step 5: Start the VM.
