Manual:The Dude/Device discovery: Difference between revisions
| Line 68: | Line 68: | ||
[[File:SS-2010-06-30 12.33.15.png|border]] | [[File:SS-2010-06-30 12.33.15.png|border]] | ||
{{Note| It is possible to stop scanning by selecting the running scan, and clicking on the blue '''minus''' button.}} | {{Note| It is possible to stop scanning by selecting the running scan, and clicking on the blue '''minus''' button.}} | ||
Revision as of 12:43, 1 July 2010
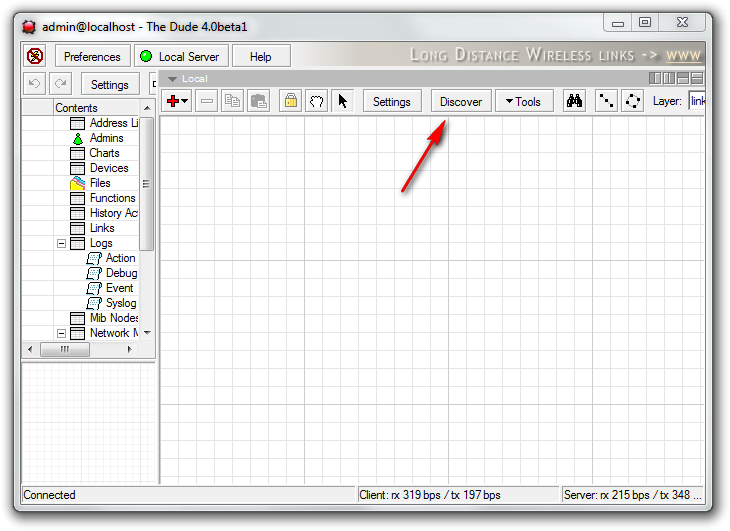
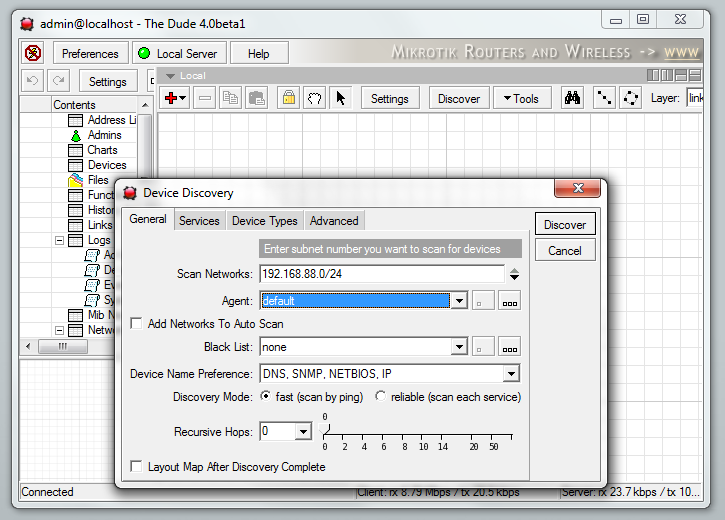
The Dude can automaticall scan ranges of IP addresses to discover active devices on your networks. To do this, you have to use the Discovery interface. Upon first use of the Dude, the discovery window is opened automatically, however, you can also open the discovery interface later, by clicking the Discovery button in the main button panel.
The discovery windows provides you with several options
General
- Scan networks - enter the IP networks that you wish The Dude to scan. Click the black "down" arrow to add more networks
- Agent - select another Dude agent for the scan task. The Default agent is selected upon first use, and it's the local server. Click on the ... icon to browse for other agents or to add new agents.
- Add networks to auto scan - when checked, this option will keep updating the map when new devices appear even after the initial scan is finished. The default scan interval is one hour, you can change this in the main Dude Settings menu.
- Black list - You can select which devices should not be scanned. This is useful if you have printers that react strangely to port scans, or devices that don't like to be pinged. Click the ... button to create lists of devices to be used in the Blacklist.
- Device name preference - decides how to name your devices by default. Can choose between DNS, SNMP, NETBIOS and IP or combinations of those. If the field is set to DNS to SNMP to IP, then DNS name will be used when available, if it is not, then SNMP-derived name will be used, but if neither of them are detected, then IP address will be used as the device name.
- Discovery mode - can choose between Fast scan by ping and Reliable scan that scans each service. When choosing the fast scan, all devices that can respond to ping will be added to the Map, and then their services will be proofed. However, if you choose Reliable scan, the Dude will look for the specified services even in the devices that couldn't be pinged. This is helpful if you have devices which can't be pinged, or which have the ping blocked.
- Recursive hops - whether to scan recursively all the networks found connected to the initially discovered devices. I.e., in case there were some network devices detected which are connected to more than one network, whether to continue scanning also the network these devices are connected to. This parameter is set to the maximal hop (network device) number, which to scan the connected networks from. Important! It is not recommended to set more than 1 hop at your initial discovery, and never to set more than 5, as this will most likely scan thousands of devices in all of your local networks, and will take a long time.
- Layout after discovery is complete will not only put the devices on the map in sequential rows, but will also attempt to draw a logical map layout. Especially useful if discovering by more than 1 hop.
Services
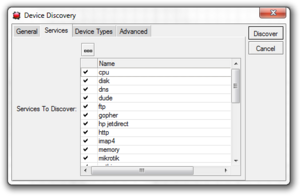
This tab defines which services need to be scanned at the time of discovery. To improve discovery time, you should uncheck the services you are not interested in. This also decides which services to probe at IP addresses that did not respond to ping.
the ... button allows you to add new probes that will look for other services.
Device Types
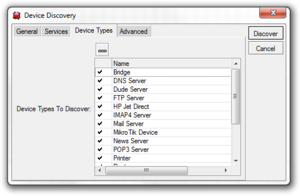
The dude can also automatically assign icons to your devices, based on the device type. Device types can be configured by clicking the ... button. Each device can have required identification patterns, based on services The Dude discovered running on it. For example the predefined requirement for a "Mail server" device type is a running SMTP service. You can change the required services for existing devices, or add new devices with new requirements.
Advanced
In the Advanced tab of the Discovery window you can deselect certain tasks that you don't want to be done.
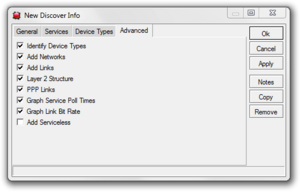
- Identify device types - follow the rules set in the Device Types menu
- Add networks - include icons for networks
- Add links - link devices together with lines
- Layer 2 structure -
- PPP links
- Graph service poll times
- Graph link Bit rate
- Add Serviceless (deselected by default)
Discovery Process
After you have selected all the options, click on Discover and the process will be started. This will be indicated by a Scanning information in the bottom edge of the Dude main window
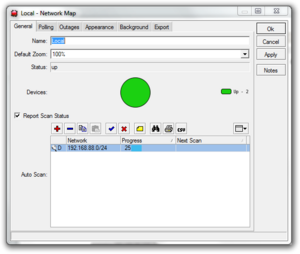
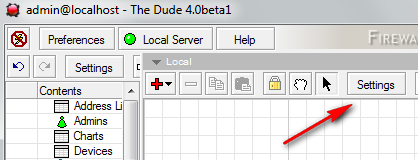
It is possible to monitor the scan progress in the map settings window. Click the Settings button in the main Dude window and in the General view you will see the currently running scan, and the time of the next scan, if auto-scan was requested.

Note: It is possible to stop scanning by selecting the running scan, and clicking on the blue minus button.
