Manual:First time startup: Difference between revisions
No edit summary |
m Protected "First time startup": manual [edit=sysop:move=sysop] |
(No difference)
| |
Revision as of 13:33, 28 November 2008
After you have installed the RouterOS software, or turned on the Router for the first time, there are various ways how to connect to it:
Method 1. Console Cable
If your device is a RouterBOARD, it doesn't have a monitor connector. You will have to either find a console cable (or Null modem cable) or see Method 2.
Plug one end of the serial cable into the console port (also known as a serial port or DB9 RS232C asynchronous serial port) of the RouterBOARD and the other end in your PC (which hopefully runs Windows or Linux). You can also use a USB-Serial adapter. Run a terminal program (HyperTerminal, or Putty on Windows) with the following parameters for All RouterBOARD models except 230:
115200bit/s, 8 data bits, 1 stop bit, no parity, flow control=none by default.
or for RouterBOARD 230:
9600bit/s, 8 data bits, 1 stop bit, no parity, hardware (RTS/CTS) flow control by default.
and you should be connected to the Router and can start by logging in and issuing the setup command (see top of the page for details).
Method 2. Winbox and MAC telnet
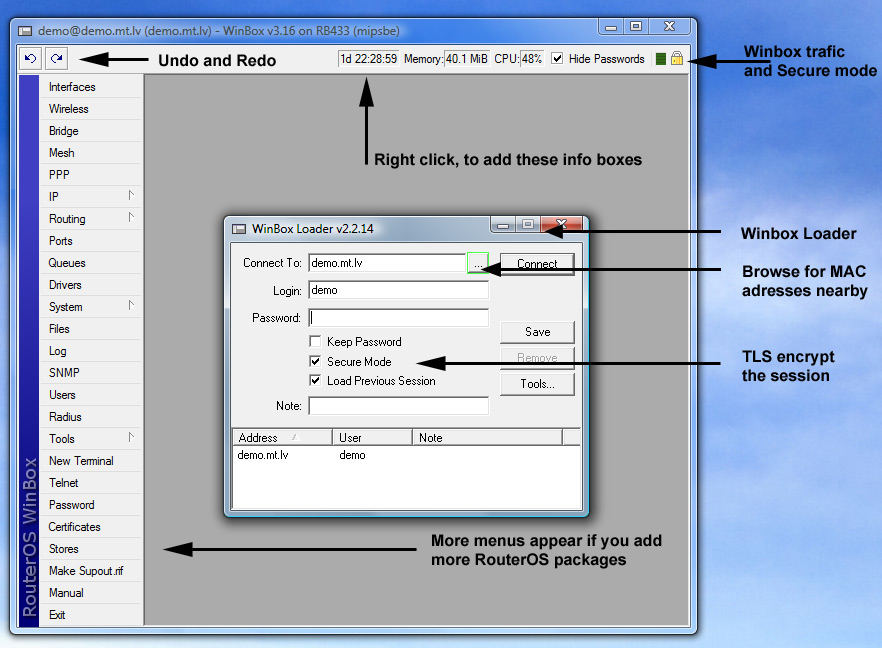
You can download the Winbox application from here: WinBox. Make sure that your Windows computer is directly connected to the router with an Ethernet cable, or at least that they both are connected to the same switch. Run Winbox, then click the [...] button and see if Winbox finds your Router and it's MAC address. If yes, connect to it and the Winbox GUI interface will be shown. You will be able to set up some initial parameters, but it is wise to allocate an IP address to the interface you have connected to on the RouterBoard (or Mikrotik PC) as this technique of communicating to the device via the MAC address uses network broadcasts and is not 100% reliable. Due to the use of broadcasting it is not therefore wise to use this on a real production / live network!
Follow the manual about configuring the router
This method works with any device that runs RouterOS
Method 3. Monitor and Keyboard
Simply attach a monitor to the video card connector of the computer (note: RouterBOARD products don't have this, so use Method 1 or 2) and see what happens on the screen. You should see a login promt like this:
MikroTik v3.16
Login:
Enter admin as the login name, and hit enter twice (because there is no password yet), you will see this screen:
  MMM      MMM       KKK                          TTTTTTTTTTT      KKK
  MMMM    MMMM       KKK                          TTTTTTTTTTT      KKK
  MMM MMMM MMM  III  KKK  KKK  RRRRRR     OOOOOO      TTT     III  KKK  KKK
  MMM  MM  MMM  III  KKKKK     RRR  RRR  OOO  OOO     TTT     III  KKKKK
  MMM      MMM  III  KKK KKK   RRRRRR    OOO  OOO     TTT     III  KKK KKK
  MMM      MMM  III  KKK  KKK  RRR  RRR   OOOOOO      TTT     III  KKK  KKK

  MikroTik RouterOS 3.16 (c) 2008       http://www.mikrotik.com/


Terminal ansi detected, using single line input mode
[admin@router] >
Now you can start configuring the router, by issuing the setup command.
This method works with any device that has a video card and keyboard connector
