Manual:CHR AWS installation: Difference between revisions
| Line 1: | Line 1: | ||
== Launching CHR on Amazon Web Services (AWS) == | == Launching CHR on Amazon Web Services (AWS) == | ||
There are several steps that are necessary to lauch a CHR instance on AWS. By default only SSH (command line) access and only using SSH keys is allowed to Amazon instances. | There are several steps that are necessary to lauch a CHR instance on AWS. By default only SSH (command line) access and only using SSH keys is allowed to Amazon instances. | ||
=== SSH Keys on Windows === | === SSH Keys on Windows === | ||
| Line 26: | Line 20: | ||
* Default username is 'admin' | * Default username is 'admin' | ||
[[File:CHR_SSH_07.png]] | [[File:CHR_SSH_07.png]] | ||
=== SSH Keys on Linux/macOS === | |||
If you're using Linux or macOS, you can generate SSH keys either on your computer using 'ssh-keygen' command or using Amazon generated key and connect from the terminal using following command: | |||
ssh -i private.key admin@1.2.3.4 | |||
where 1.2.3.4 is the IP of your CHR instance on AWS. The private.key file permissions have to be set so that only the owner has access to it. Use command | |||
chmod 600 private.key | |||
to alter the permission. See previous section how to upload your SSH keys to AWS. | |||
''For more info see [https://docs.aws.amazon.com/AWSEC2/latest/UserGuide/EC2_Network_and_Security.html Amazon EC2 User Guide -> Network and Security section]'' | ''For more info see [https://docs.aws.amazon.com/AWSEC2/latest/UserGuide/EC2_Network_and_Security.html Amazon EC2 User Guide -> Network and Security section]'' | ||
Revision as of 14:45, 4 August 2016
Launching CHR on Amazon Web Services (AWS)
There are several steps that are necessary to lauch a CHR instance on AWS. By default only SSH (command line) access and only using SSH keys is allowed to Amazon instances.
SSH Keys on Windows
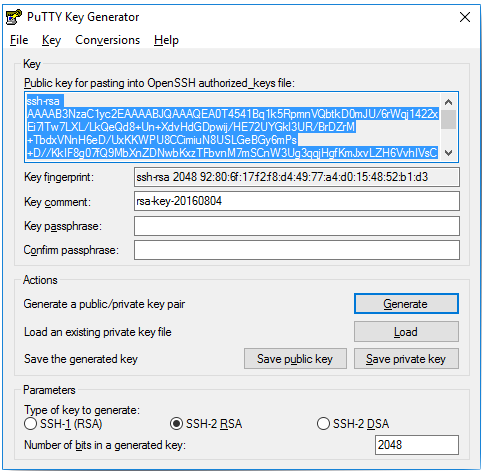
To generate SSH key on Windows PuTTYgen tool is needed.
- Generate SSH key pair, save both the private and the public part to your computer
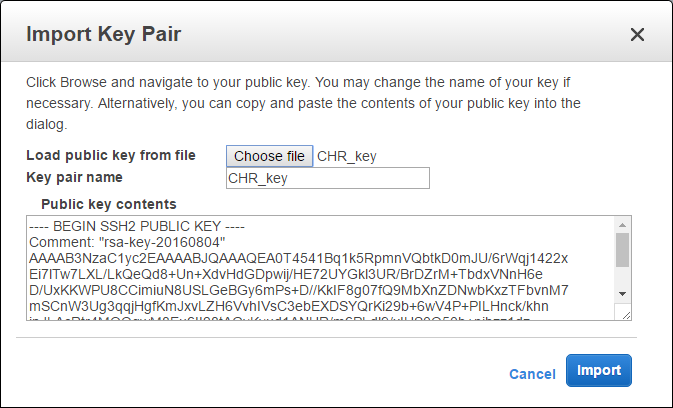
- Upload the public part to the AWS EC2 Dasboard -> Key Pairs
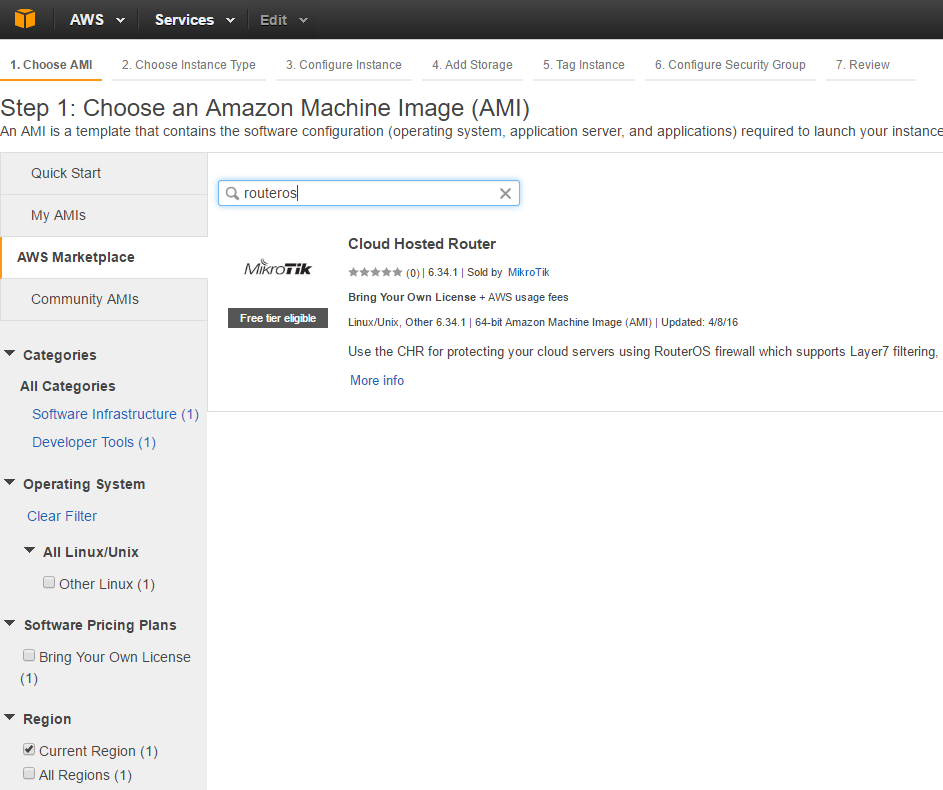
- Launch the CHR instance from AWS marketplace
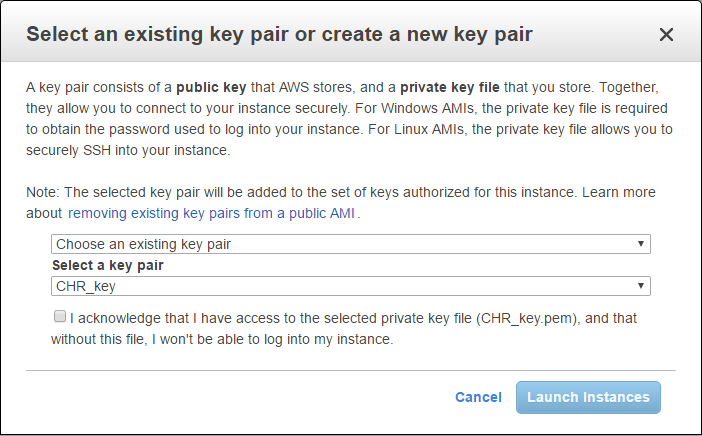
- Select the SSH key
- The IP address of your CHR instance is available in EC2 Management Console -> Running Instances screen
- Connect to the CHR instance using PuTTY
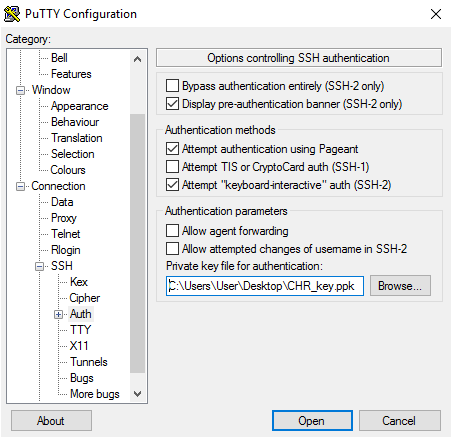
- Select the private key (PuTTY: Connection -> SSH -> Auth section)
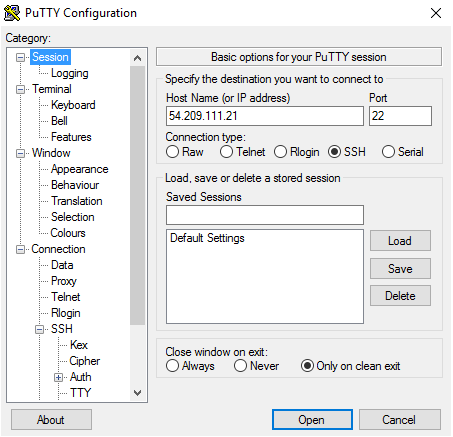
- Enter the IP address
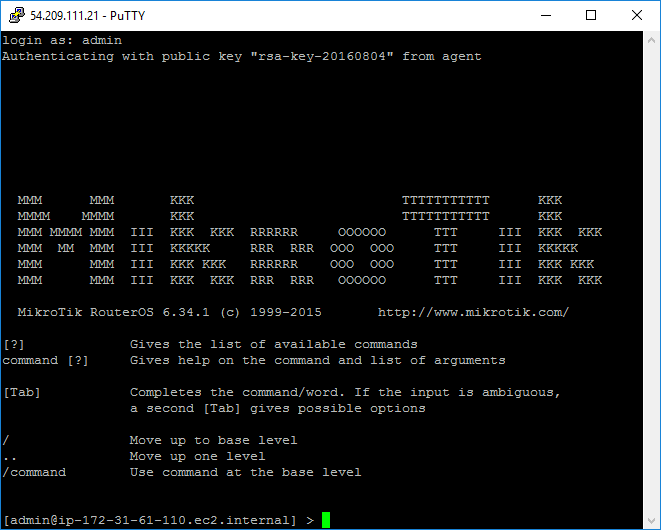
- Default username is 'admin'
SSH Keys on Linux/macOS
If you're using Linux or macOS, you can generate SSH keys either on your computer using 'ssh-keygen' command or using Amazon generated key and connect from the terminal using following command:
ssh -i private.key admin@1.2.3.4
where 1.2.3.4 is the IP of your CHR instance on AWS. The private.key file permissions have to be set so that only the owner has access to it. Use command
chmod 600 private.key
to alter the permission. See previous section how to upload your SSH keys to AWS.
For more info see Amazon EC2 User Guide -> Network and Security section
Creating your own CHR image

Warning: Following instructions are necessary ONLY if you want to make your own CHR image. Ready to use CHR image is available from Amazon Marketplace (see above)
Tools required
To get CHR RouterOS running on Amazon AWS cloud at this moment, there are certain steps that you have to do to get this working from scratch.
- Virtual management software that works with ISOLINUX booter/installer on CHR image (KVM, VirtualBox or VMWare Workstation, VMWare Fusion, Hyper-V these tools are interchangeable);
- Tool to resize the image file prior the installation as default image is 64MB of size and in some cases, more storage is required (qemu-img, VMWare built-in tool, VirtualBox external tool);
- AWS API tools installed and configured (ec2-*).
Installation steps (long version)
- Resize the image before installing the RouterOS. Amazon AWS minimal image size is 1GB. After RouterOS is installed it will be much harder to change the available size, the following command will increase the image size to 940MB
qemu-img resize chr-6.34rc21.img +870M
- Import the image as a volume on your AWS. As a return you will get the volume ID
ec2-import-volume chr-6.34rc21.img -f raw -s 1 -b <bucket> -o <AKIAEXAMPLELALALA> -w <SECRETACCESSKEY > -z eu-west-1a
The import may take a while, it is possible to follow the progress:
ec2-describe-conversion-task <task id>
- Create a snapshot. Correct volume ID will be availabe when the previous command ends or from your AWS account
ec2-create-snapshot vol-e3c74810
- Register AWS image as an AMI
ec2-register -n CHR -s snap-a664a48e -d "6.34rc21" -a x86_64 --virtualization-type hvm
- Now you can launch the instance from your AMI.
