Using Discovery
Discovery
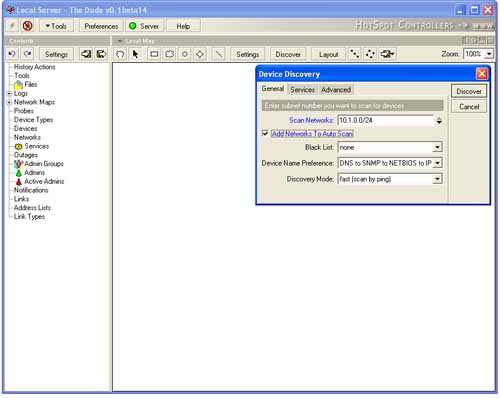
Discovery is a Dude tool that scans the network for online devices and their services. For example we want to scan the Network 10.1.0.0/24 and discover which devices are online and what services each device has. To start the discover click on the Discover button and you will see this menu:
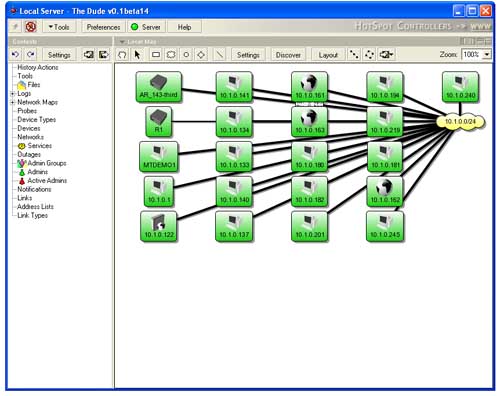
Here you can specify which network to scan for devices. To scan one C class (/24 network) it could take approximately 1 minute depending on how many devices you have in that network. You can also enable the autodiscovery feature which will add this network to the auto-scan list and will scan this network for new devices within specified time intervals. To enable that - select the checkbox for the 'Add Networks To Auto Scan'. After you click on the Discover button, the Dude will start the discovery process. You will notice that new devices will appear on the map. You can see the progress of the discovery in the status bar. When the discovery is finished, the status bar will disappear and you will get a network map:
Layout
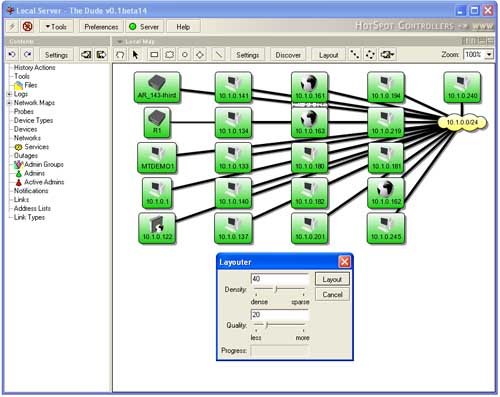
If you want to change the layout of the map - arrange all devices on the map so that you would better overlook them. Note, that Layout works on the items that you have selected. If you want to rearrange the entire map, don't select any items in this map. To start the rearrange process click on the Layout button and you will see such menu:
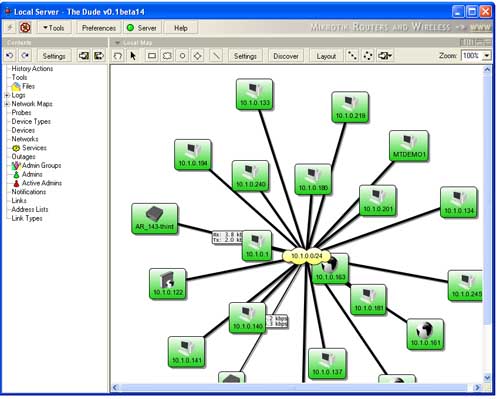
There you can specify the item density on the map and also the quality of the Layout proccess. If you will increase the quality then the process could take more time to complete. When you have configured the Layouter click on the Layout button and you will see that the progress bar will start to fill. When the progress bar will be full the process will be completed and you would see such rearranged map:
Note that the items are placed outside of the maps screen, you can change Zoom to see all the devices in the map on the screen. You can also use 'Fit' option in the zoom - it will automatically fit the items to use the visible screen of the map.
Auto Scan
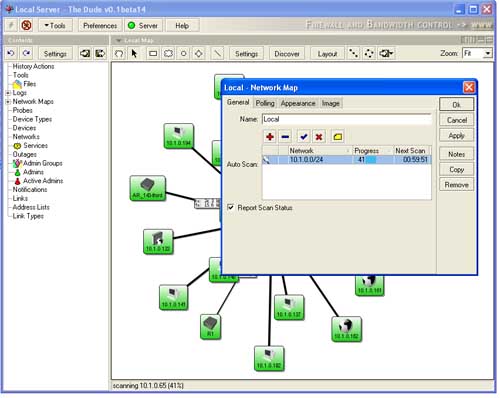
If you have specified the discovery to add the network to auto-scan list then you can click on the Settings button in the Map:
There you will see that the Auto scan window contains the network that we have added to the list. You can remove this network form this list by pressin on the '-' icon. In the Next Scan column you will see the countdown time when the next autoscan will start. Also there is a Progress column for each network which shows the scaning progress.
