Manual:CHR Hyper-V installation: Difference between revisions
Jump to navigation
Jump to search
m (→See also) |
No edit summary |
||
| Line 1: | Line 1: | ||
==Setting up the guest== | ==Setting up the guest== | ||
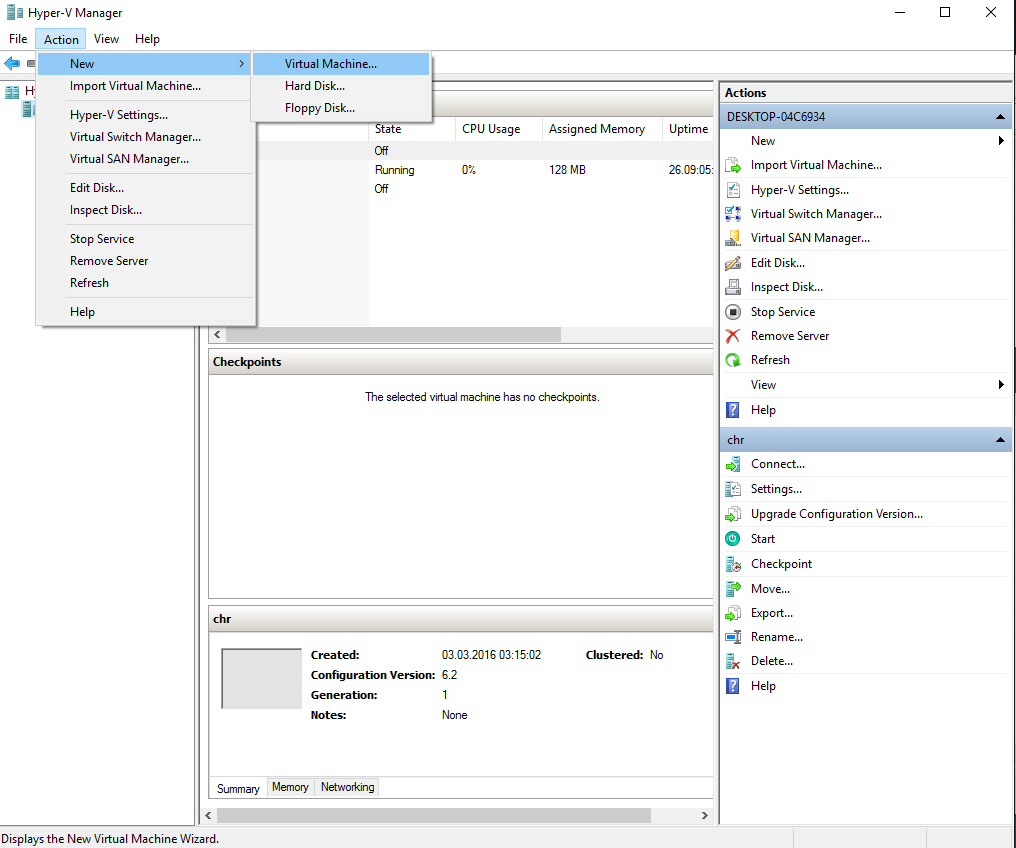
Choose to make new Hyper-V guest | * Step 1: Choose to make new Hyper-V guest | ||
[[File:hyper1.png]] | [[File:hyper1.png]] | ||
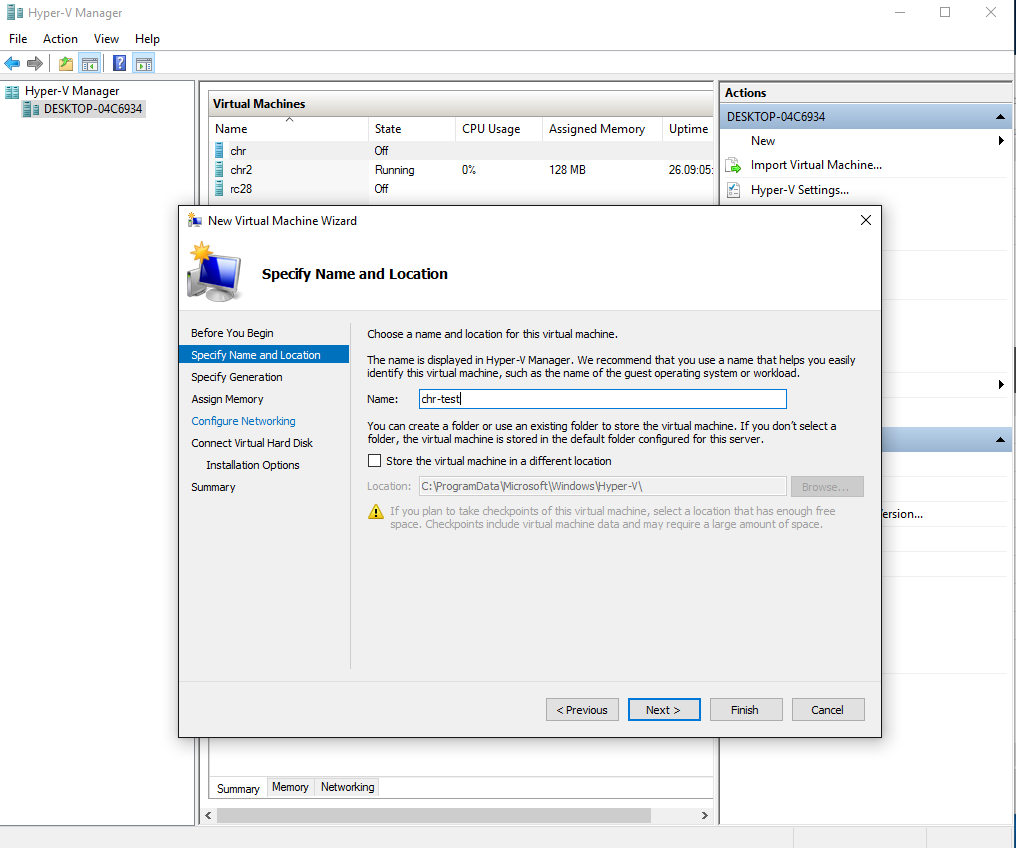
Choose a name of the guest | Choose a name of the guest | ||
[[File:hyper2.png]] | [[File:hyper2.png]] | ||
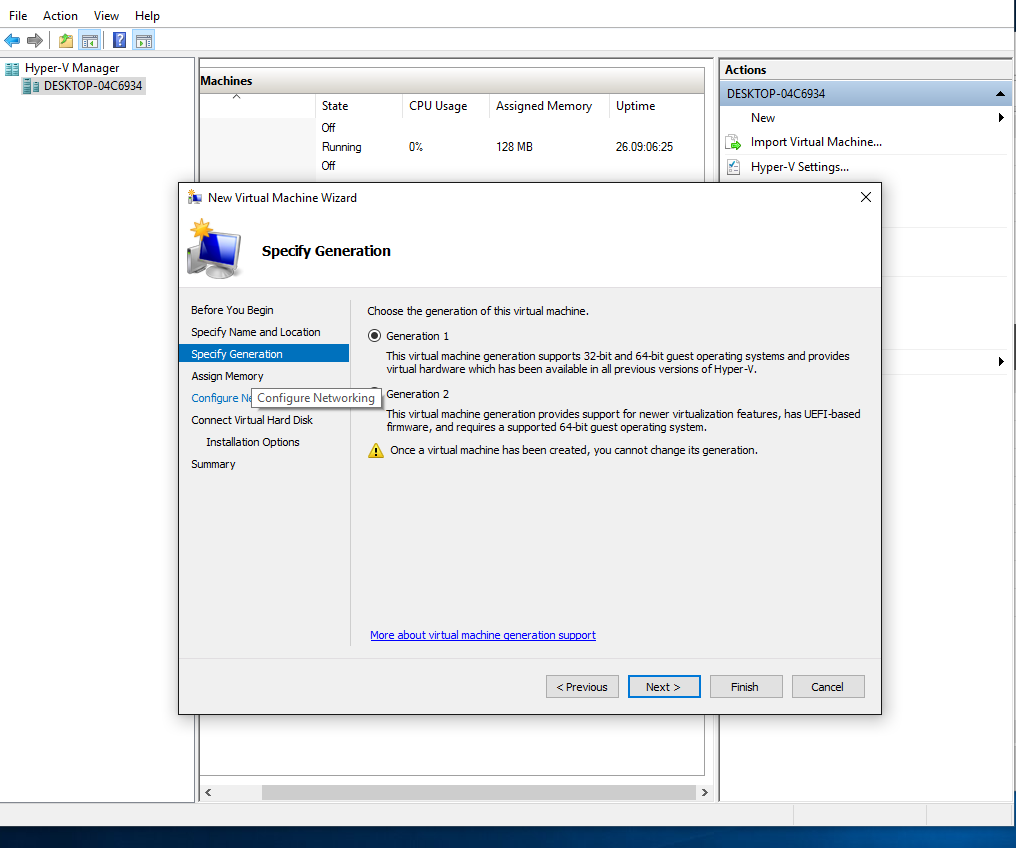
* Step 2: "Generation 1" should be used for RouterOS guests | |||
"Generation 1" should be used for RouterOS guests | |||
[[File:hyper3.png]] | [[File:hyper3.png]] | ||
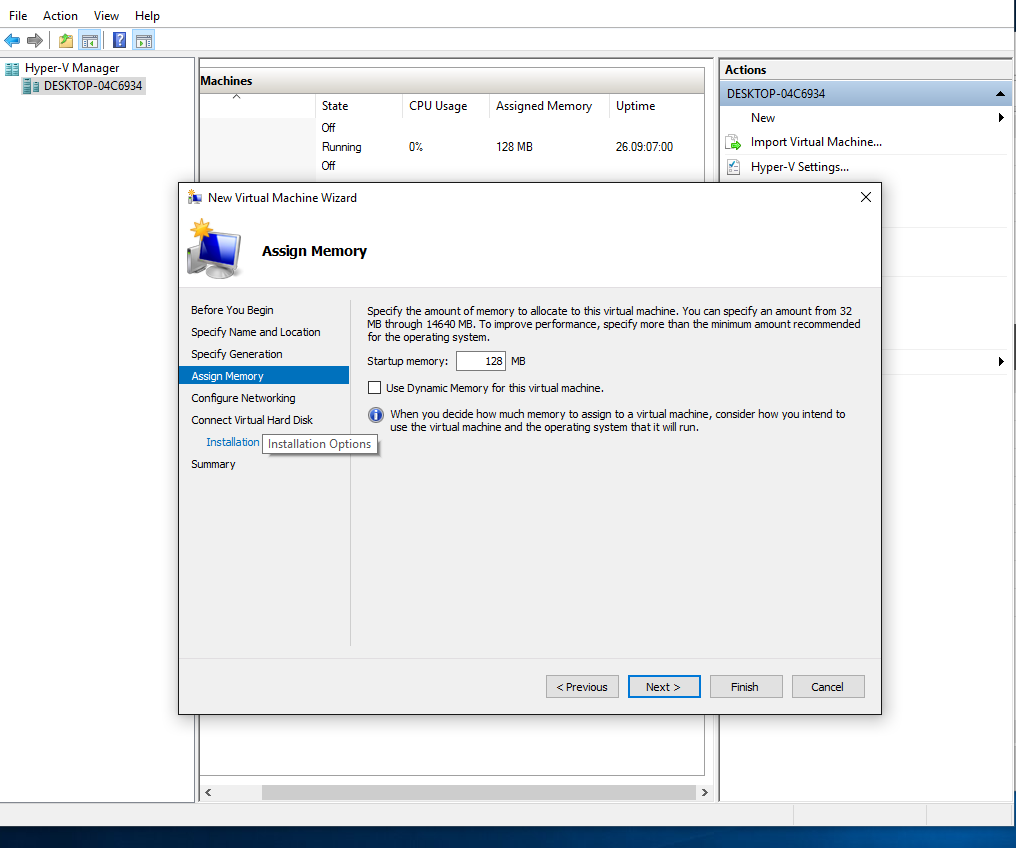
* Step 3: Select amount of RAM available for the guest, deselect dynamic management | |||
Select amount of RAM available for the guest, deselect dynamic management | |||
[[File:hyper4.png]] | [[File:hyper4.png]] | ||
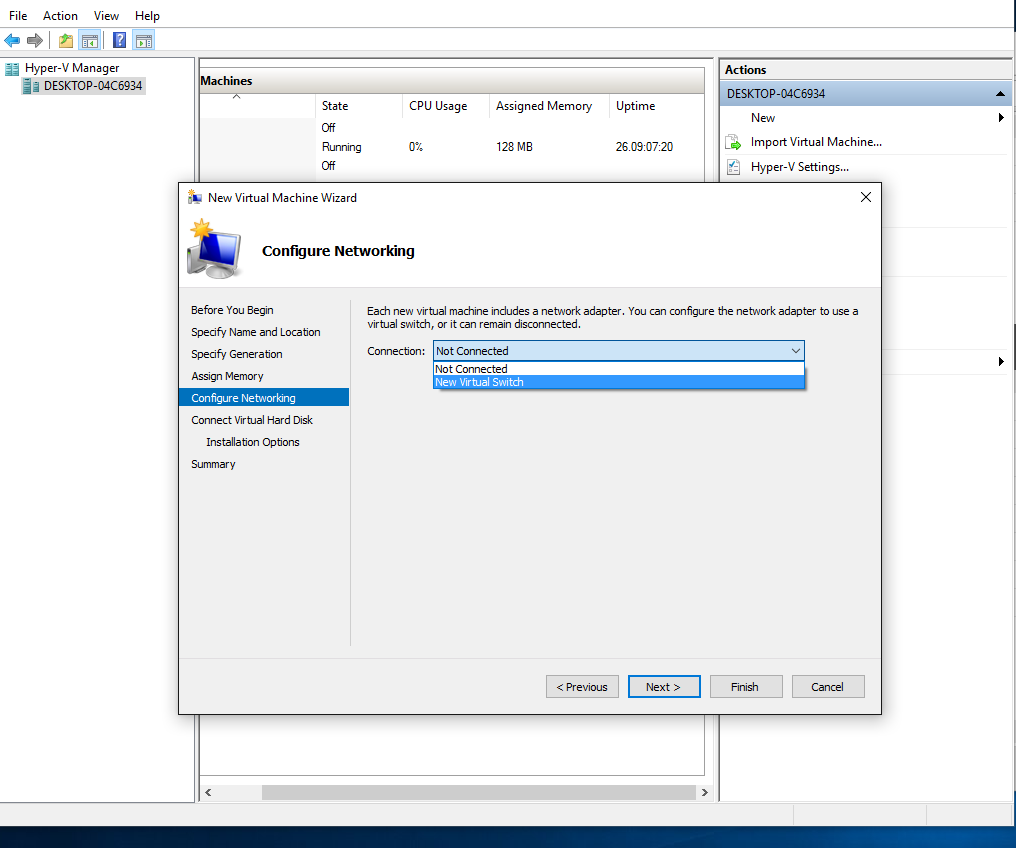
* Step 4: Choose networking capabilities for your new router. | |||
Choose networking capabilities for your new router. | |||
[[File:hyper5.png]] | [[File:hyper5.png]] | ||
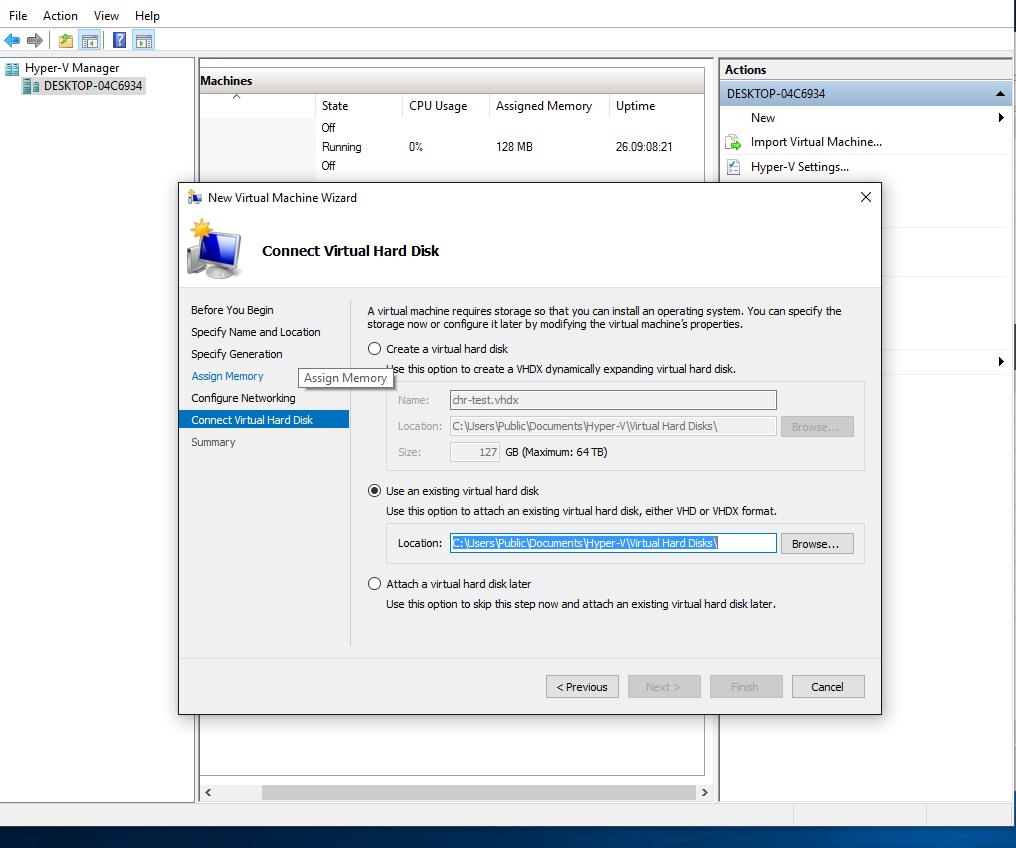
* Step 5: Do not create a new drive for the guest, instead, select option - "Use existing disk" and browse to the download folder where you have downloaded the VHDX image from the [http://www.mikrotik.com/download MikroTik download] page. | |||
Do not create a new drive for the guest, instead, select option - "Use existing disk" and browse to the download folder where you have downloaded the VHDX image from the [http://www.mikrotik.com/download MikroTik download] page. | |||
[[File:hyper6.png]] | [[File:hyper6.png]] | ||
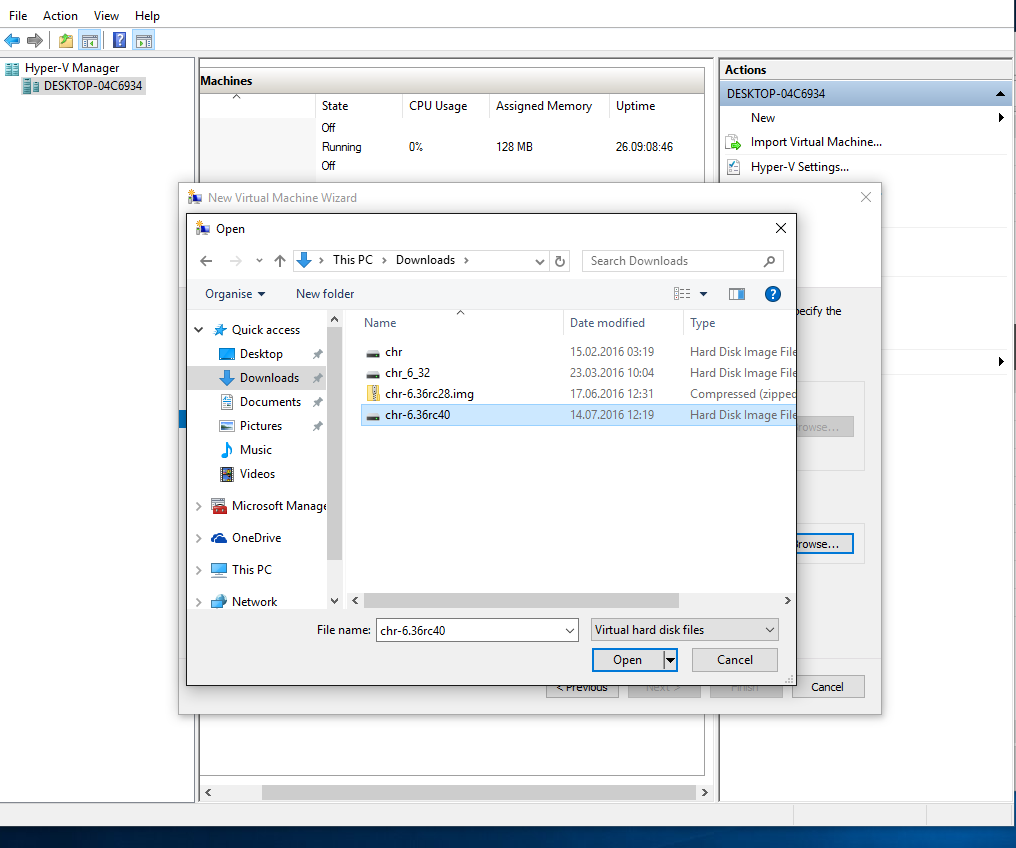
* Step 6: Select the downloaded image file. | |||
Select the downloaded image file. | |||
[[File:hyper7.png]] | [[File:hyper7.png]] | ||
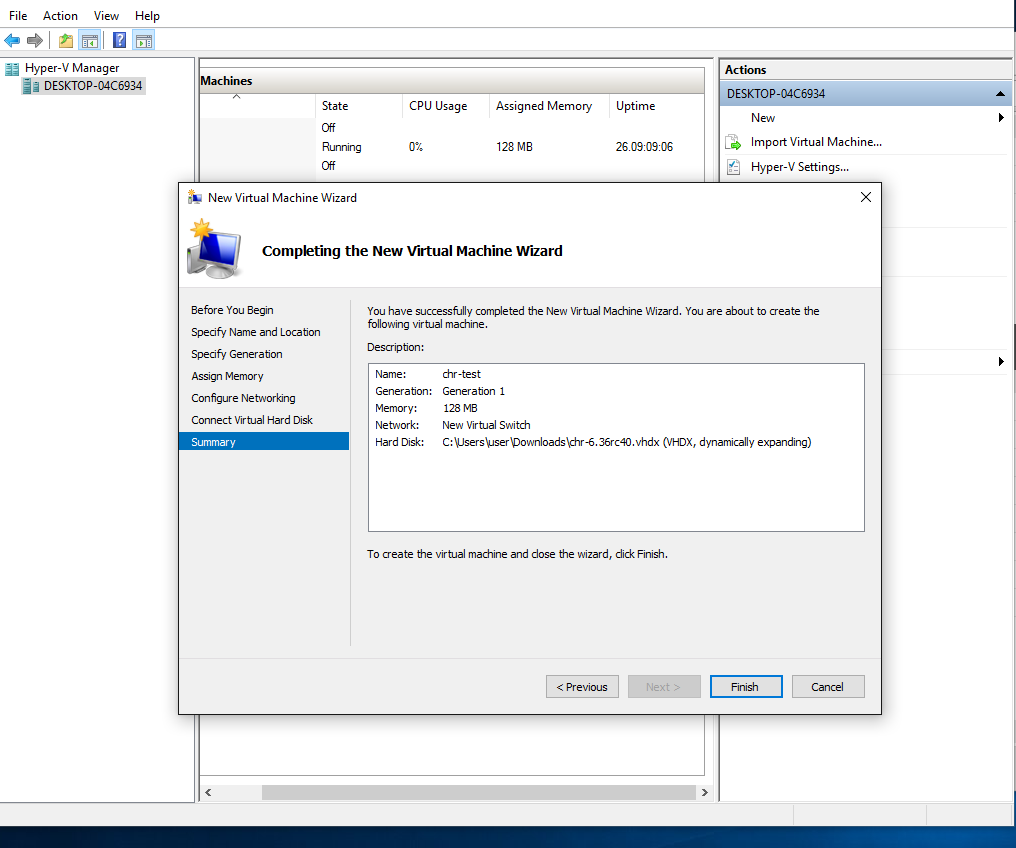
The summary of the configuration. | * Step 7: The summary of the configuration. | ||
[[File:hyper8.png]] | [[File:hyper8.png]] | ||
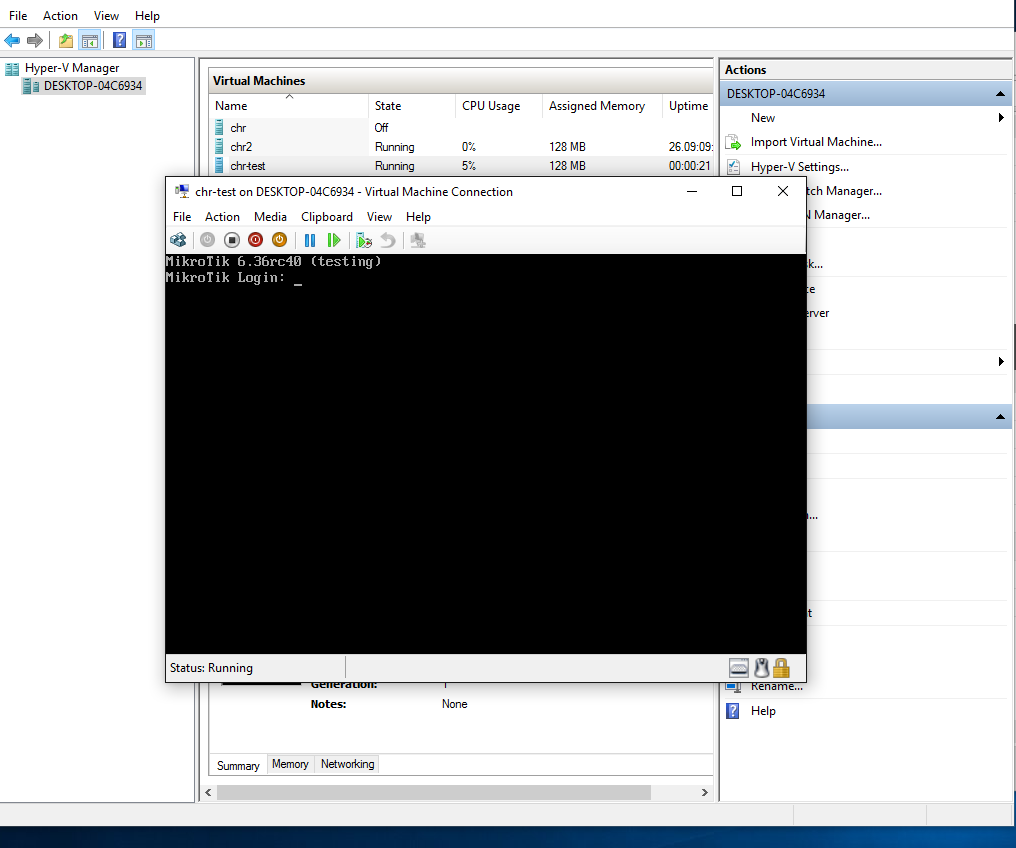
Setup is complete, just start the created guest. | * Step 8: Setup is complete, just start the created guest. | ||
[[File:hyper9.png]] | [[File:hyper9.png]] | ||
== See also == | == See also == | ||
[http://wiki.mikrotik.com/wiki/Manual:CHR CHR manual] | [http://wiki.mikrotik.com/wiki/Manual:CHR CHR manual] | ||
Revision as of 11:08, 14 July 2016
Setting up the guest
- Step 1: Choose to make new Hyper-V guest
- Step 2: "Generation 1" should be used for RouterOS guests
- Step 3: Select amount of RAM available for the guest, deselect dynamic management
- Step 4: Choose networking capabilities for your new router.
- Step 5: Do not create a new drive for the guest, instead, select option - "Use existing disk" and browse to the download folder where you have downloaded the VHDX image from the MikroTik download page.
- Step 6: Select the downloaded image file.
- Step 7: The summary of the configuration.
- Step 8: Setup is complete, just start the created guest.
