Manual:The Dude/Device list
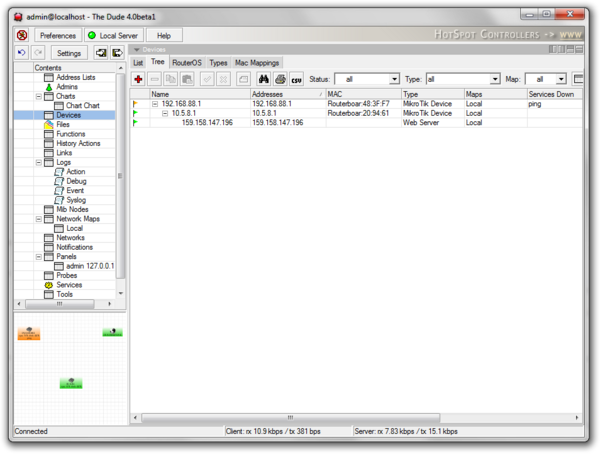
The device list can be accessed by double clicking on Devices in the left hand Menu pane, or selecting Devices from the pane dropdown menu in any of the open panes.
This section lists all devices that this server has knowledge about.
List
The List view displays all the devices sorted by name, address, MAC address, Device type, or Map they are on. It also displays which services are currently down for each device, and their notes.
In the list view you are able to add new devices, remove devices, copy and paste them, add notes, disable and enable polling for them, print or export the list, and use search.
Also available are filter dropdowns. They allow you to filter by Status, Map and Device Type, which is helpful if you have hundreds of devices on many maps.
Tree
The Tree tab is exactly the same as the List tab, but sorts the devices in threads by their hierarchy dependencies.
RouterOS
The RouterOS tab shows devices that have been marked as RouterOS in the device settings. This tab is organized in the following subsections:
Device
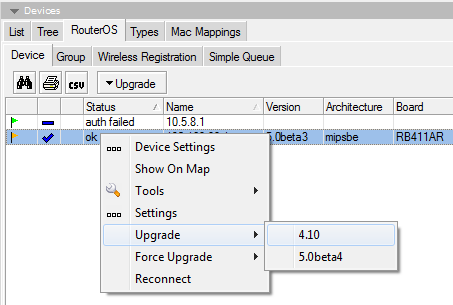
Shows a list of RouterOS devices. The table includes additional information, authentication status, version, architecture, system hardware type, upgrade status and packages.
This pane is optimized for upgrading of RouterOS devices.
Upgrading RouterOS
- Upload RouterOS packages to the Dude Server. This can be done in the Files pane. Upload any types of packages and versions, The Dude can tell them apart
- Select the device you like to upgrade, and click the Upgrade button, or right-click the device and choose Upgrade
- The Dude will only show appropriate package types and versions in the Upgrade menu. Choose the preferred version to commence upgrade process
Group
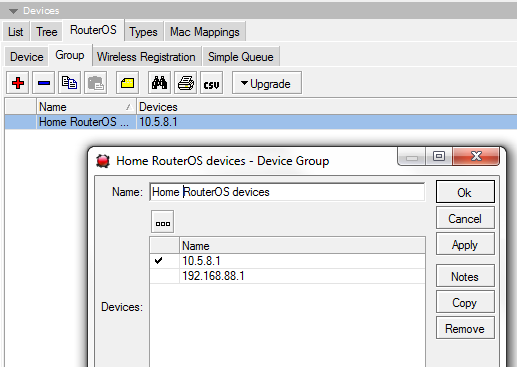
It is possible to create Groups of RouterOS devices, to simplify the upgrade process. To avoid interruption of processes while one router is rebooted but others are still getting the package files, it is recommended to group devices by reachability or location.
That way, if uploading packages to 20 routers at the same time, the closest router will not be rebooted because of faster upload time, only to interrupt the rest of the 19 uploads.
To create a new RouterOS Device Group, click on the add button and select the RouterOS devices from the provided list.

Note: If there are no devices listed, make sure that your RouterOS devices are marked as RouterOS in the device settings dialog
Wireless Registration
The registration table shows all wireless devices that are connected to your RouterOS devices in a combined interface. The table shows the following information:
- Device - which device is the owner of the particular registration table entry
- Radio name - the name of the wireless device, as it was set in RouterOS wireless settings
- MAC - MAC address of the device that was connected to the particular Device
- AP - whether this device is a client or an AP
- WDS - whether WDS is used in this particular connection
- TX/RX Rate - Current datarate of the connection
- TX/RX Signal - Signal levels of the connection
- Comment - Comment
- Last IP - the last IP address which sent a packet to the device. Is not directly related to this entry, or the wireless connection
Simple Queue
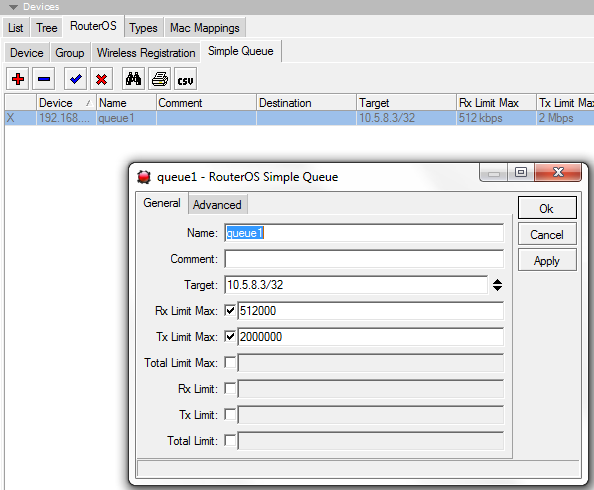
Allows to view and edit simple queues in RouterOS. If your RouterOS devices contain simple queues, they will be displayed in this window. You can double-click a Queue and edit it's basic values as seen in the image above. Clarification of the values can be read in the RouterOS Queues manual.
Types
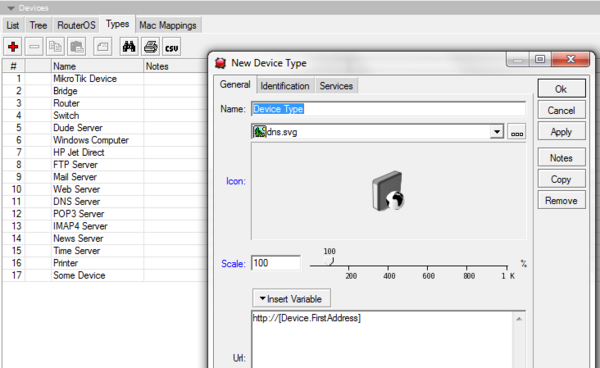
It is possible to assign icons to your devices, based on the device type. Device types can be configured in this menu.
Each device can have required identification patterns, based on services The Dude discovered running on it. For example the predefined requirement for a "Mail server" device type is a running SMTP service. You can change the required services for existing devices, or add new devices with new requirements. These predefined requirements will be used when using the Device discovery
Adding a new Device Type
By clicking the add button in the Types tab of the Devices pane you can add new Device types. The add dialog contains the following fields:
- Name - the name of the new type
- Icon - the image of the device icon. Shows dropdown list from the Files section. Also shows icon preview.
- Scale - The icon for this particular type can be defined as smaller or larger than normal. Default value is 100%
- URL - The link to the HTTP webpage of this particular device, is used in the Web tool in the device right-click Tools menu. This setting allows any attributes and variables to be used, for example:
http://[Device.FirstAddress]/cfg?user=[Device.UserName]&password=[Device.Password]&process=login
In the Identification and Services tabs, you can set the Required, Allowed and Ignored services for this type of device. These settings will be used by default when adding a new device of this type, and when using the Device discovery
