Manual:Webfig
Summary
WebFig is web based RouterOS configuration utility. It is accessible directly form the router and no additional software is required (except web browser, of course). WebFig is designed as an alternitive of WinBox, both have similar layouts and both have access to almost any feature of RouterOS.
Connecting to Router

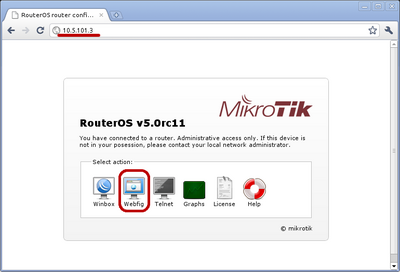
WebFig can be launched from the routers home page which is accessible by entering routers IP address in the browser. When home page is successfully loaded, choose webfig from the list of available icons as illustrated in screenshot.
After clicking on webfig icon, login prompt will ask you to enter username and password. Enter login information and click connect.
Now you should be able to see webfig in action.
IPv6 Connectivity
RouterOS http service now listens on ipv6 address, too. To connect to IPv6, in your browser enter ipv6 address in square brackets, for example [2001:db8:1::4]. If it is required to connect to link local address, don't forget to specify interface name or interface id on windows, for example [fe80::9f94:9396%ether1].
Interface Overview
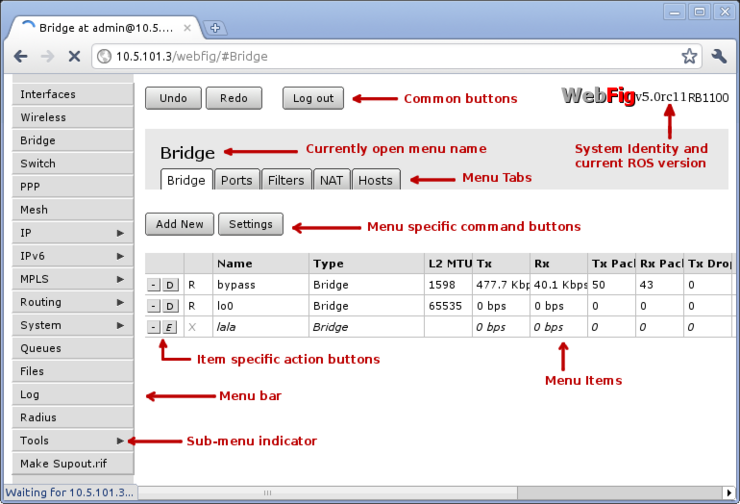
WebFig interface is designed to be very intuitive especially for WinBox users. It has very similar layout: menu baron the left side, undo/redo at the top and work are at the rest of available space.
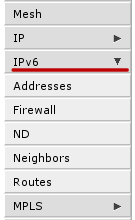
Menu bar has almost the same design as WinBox menu bar. Little arrow on the right side of the menu item indicates that this menu has several sub-menus.

When clicking on such menu item, sub-menus will be listed and the arrow will be pointing down, indicating that sub-menus are listed.
At the top you can see three common buttons Undo/Redo buttons similar to winbox and one additional button Log Out. In the top right corner, you can see WebFig logo and RouterBOARDS model name.
Work area has tab design, where you can switch between several configuration tabs, for example in screenshot there are listed all tabs available in Bridge menu (Bridge, Ports, Filters, NAT, Rules).
Below the tabs are listed buttons for all menu specific commands, for example Add New and Settings.
The last part is table of all menu items. First column of an item has item specific command buttons:
